

Download Source Files
- Source files for this tutorial are available to Premium members.
Get a Premium Membership
Final Image Preview
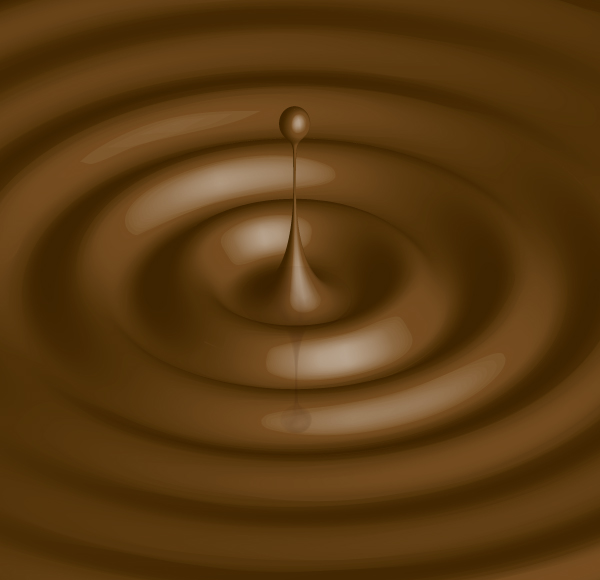
Below is the final image we will be working towards. Want access to the full Vector Source files and downloadable copies of every tutorial, including this one? Join Vector Plus for just 9$ a month.Tutorial Details
- Program: Adobe Illustrator
- Version: CS3
- Difficulty: Intermediate
- Estimated Completion Time: 30 minutes
Video Tutorial
Cheryl Graham created this video tutorial to compliment this text + image tutorial.Step 1
Create a new document of approximately 600px by 580px size. Next, with the Line Segment Tool (backslash), draw a line of 600px length and stroke it with CMYK values: C=40, M=65, Y=100, and K=35.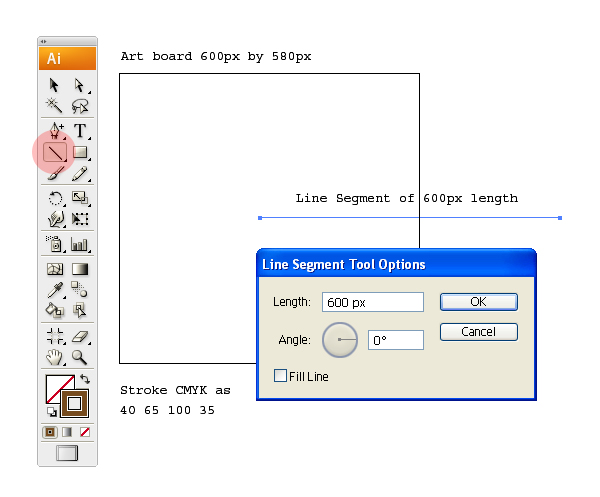
Step 2
Select the line and go to Effect > Distort & Transform > Zig Zag. Enter the values as shown in red below. This will make a wave like effect as seen in liquids.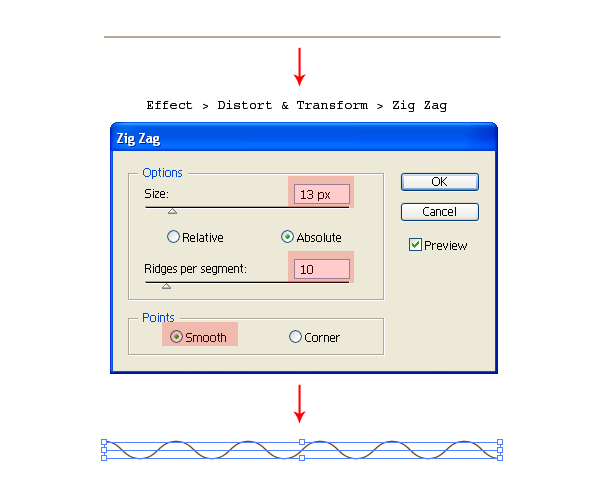
Step 3
The waves generated in a liquid vanish as they move outwards. For this, we will use some distortion. Select the line and go to Object > Envelope Distort > Make with Warp (Alt + Shift + Command + W). In the Warp Options, select the Fish effect with 50% bend. This will make the desired wave with vanishing ends.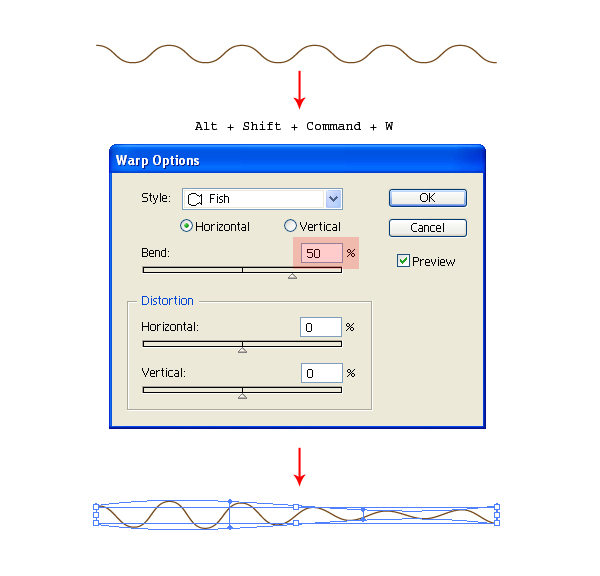
Step 4
Select the wave and expand it using Object > Expand.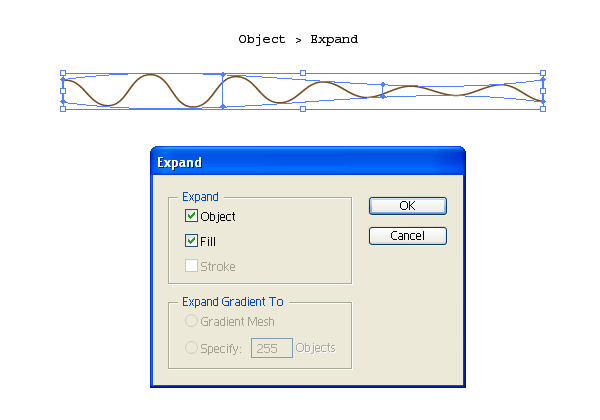
Step 5
Next, we will add a drop bounce effect. With the Direct Selection Tool (A), select the first anchor and drag it upward. With the Add Anchor Point Tool (+), add a couple of anchor points and adjust the handles to get the result shown below. You will see a King Cobra like anatomy. Keep a backup copy of this figure as we will use it later for the reflection.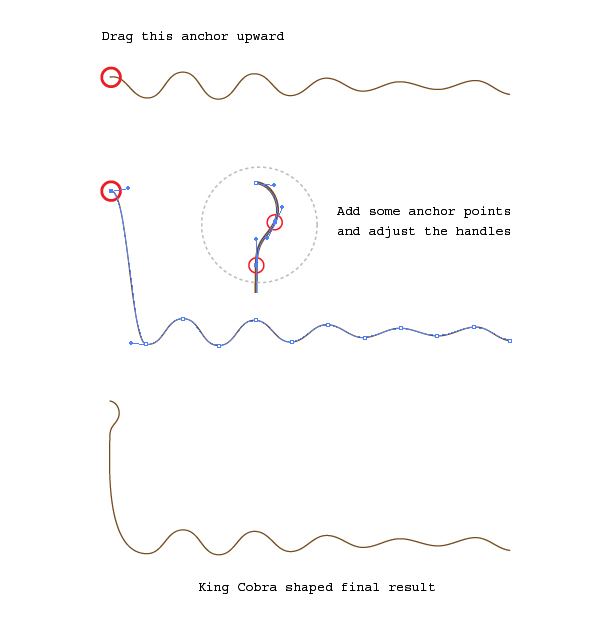
Step 6
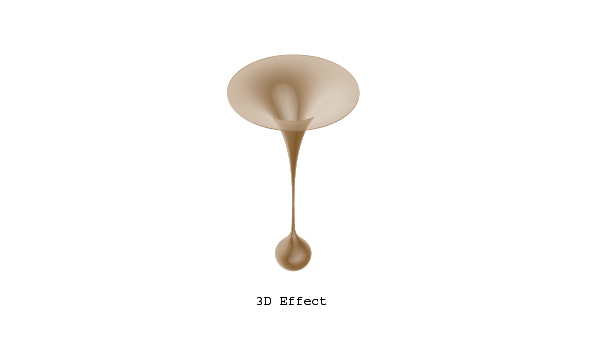
The base for our caramel effect is ready. Next, select the figure and go to Effect > 3D > Revolve. Click on More Options and enter the values as shown in the red regions below.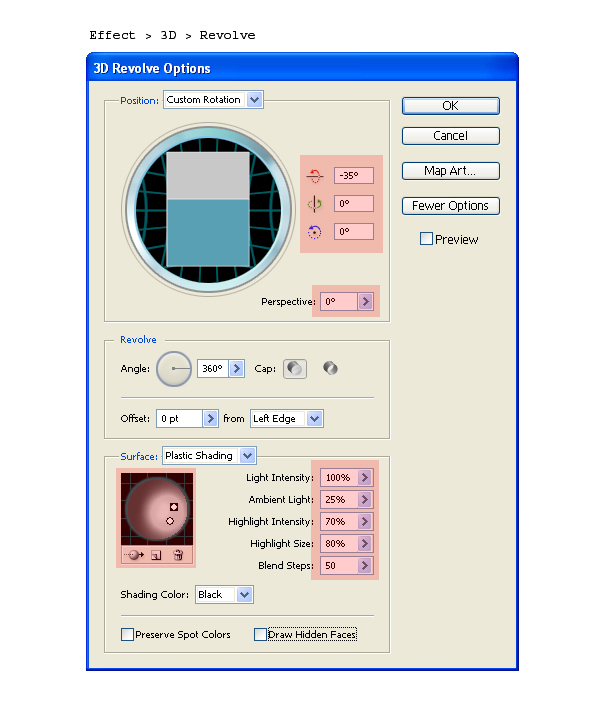
Step 7
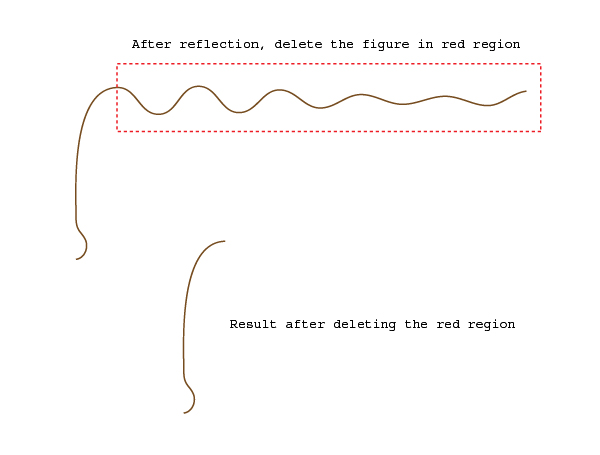
Now we will add some reflection to the bouncing drop. Grab the backup copy of Step 5 and reflect it horizontally using Object > Transform > Reflect. Next, delete the region shown in red using the Direct Selection Tool (A).
Step 8
Select the reflected figure and go to Effect > 3D > Revolve. Enter the same values as in Step 6. Change the Shading Color to Custom and assign a white shadow.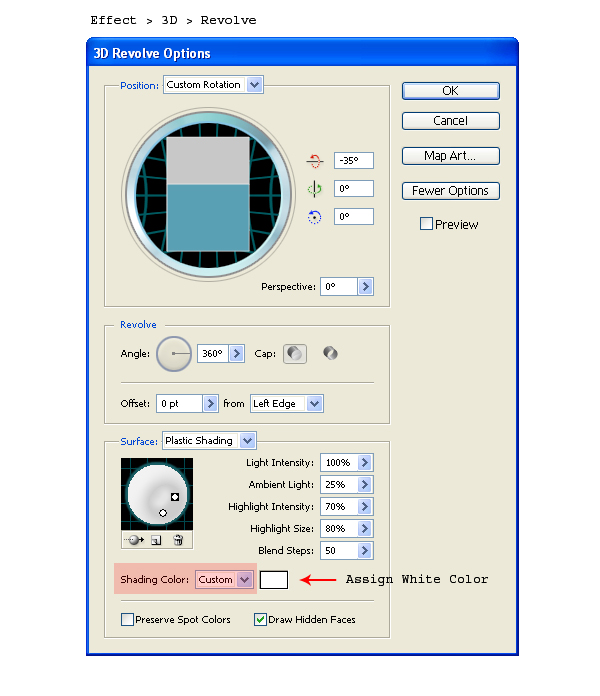
Step 9
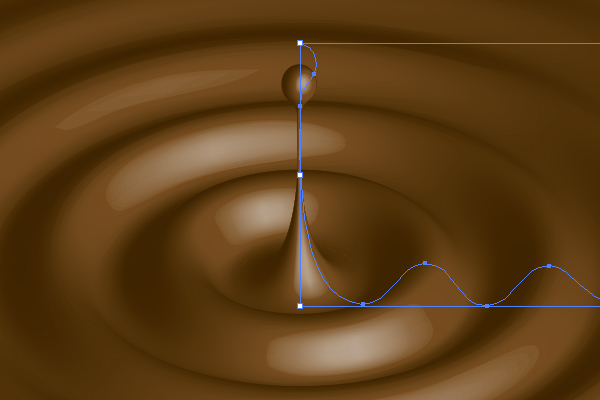
Position the shadow graphic in line with the bouncing drop. Next, adjust its Transparency to 20% and reduce its height to match with the perspective of the overall graphic.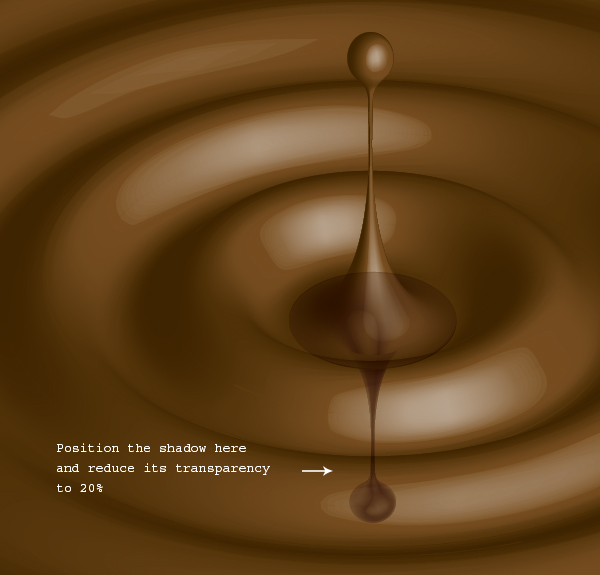
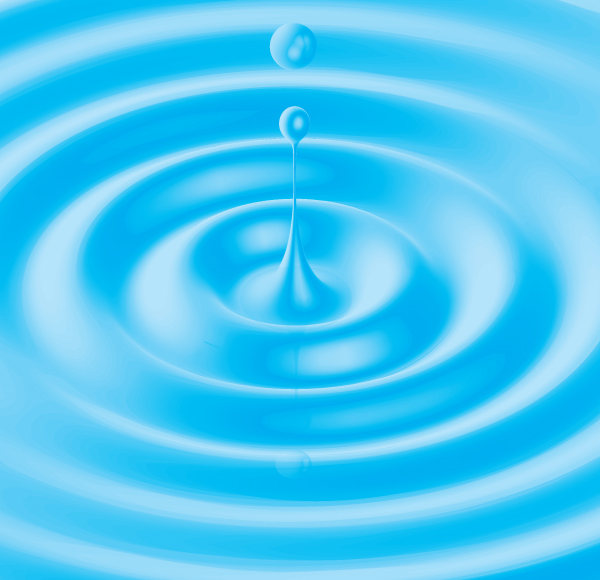
Conclusion and Scope
The techniques covered in this tutorial are an effective use of built in Illustrator Tools. The Zig Zag, Warp and the Revolve Tool yields the ripple effect in less time and effort.Below is a water ripple effect that I have created using the same technique. A mixed use of distort and warp options often yields creative results. We just need to experiment with them. I hope you enjoyed this quick and easy tutorial.
Nenhum comentário:
Postar um comentário