Fox Painting Photoshop Tutorial
Tools used
- Photoshop CS3
- Wacom Graphire4 4×5 USB (Blue)
Note: I'm using Adobe Photoshop. But if you wish…you can use the other tools like..Corel Draw etc..
Step 1:
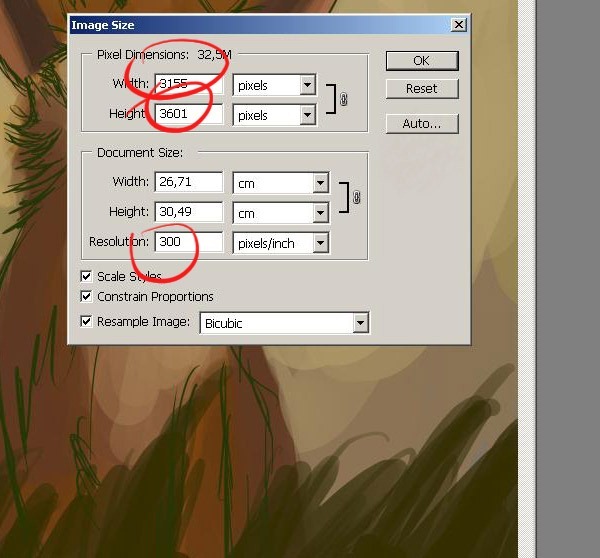
First of all Let's open a new document (approximately 900wide and 1386high, around 300 dpi) and make a preliminary sketch.(Ctrl+N or File > New). You can able to print it on A3 format in pretty good quality
- Width: 3155px
- Height: 3601px
- Resolution: 300
Step 1
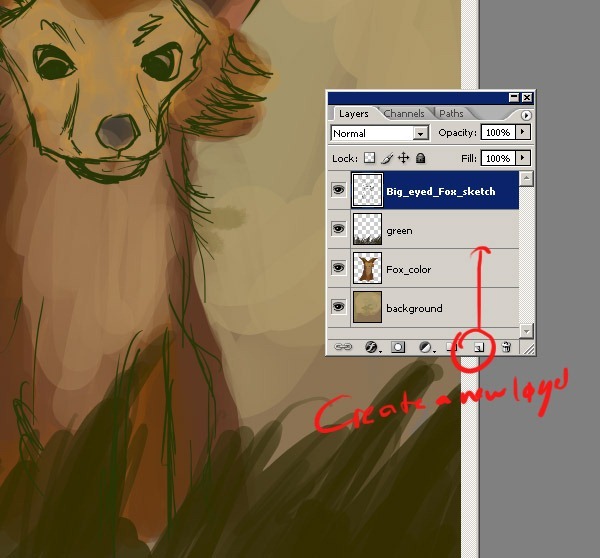
Now lets create a new layer (Ctrl/Cmd+Shift+N). You can create empty layer for your sketch. I'll show you how I open a new layer.To create empty layer, click on the create a new layer button.
Step 2
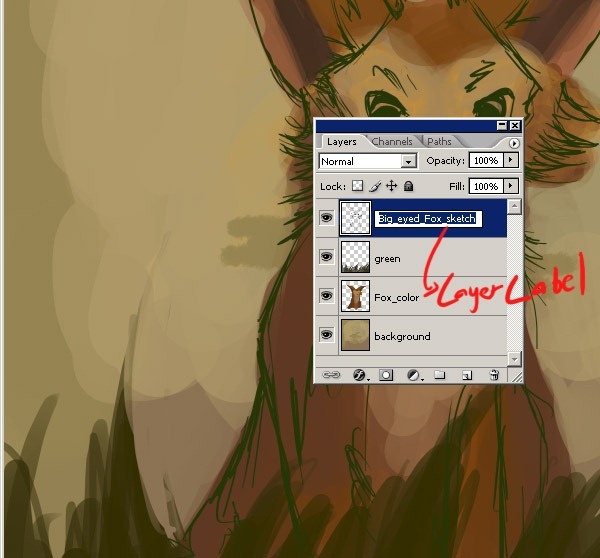
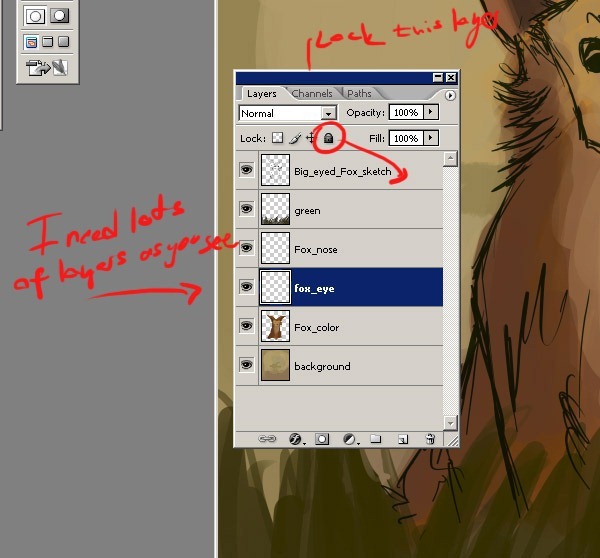
And the first thing to do after you created the layer is give the layer a describing name. To give the layer a name, you double-click on the layer label, the label will then turn into text box for you to enter a new name. Ok, as you see my layer name is Big_eyed_Fox_sketch.Name your layer with a different name.
Step 3
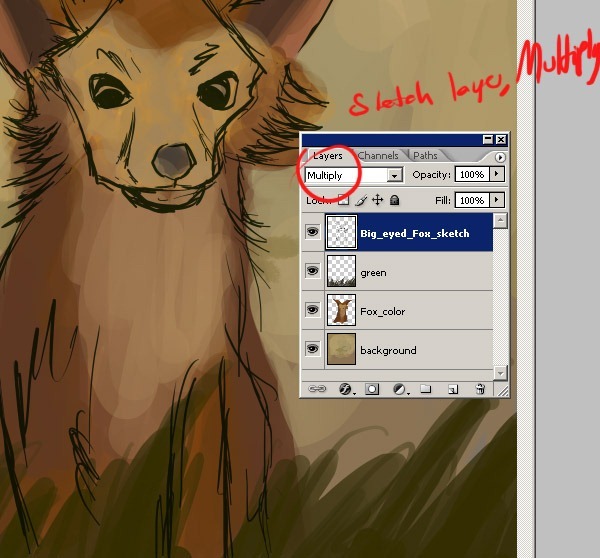
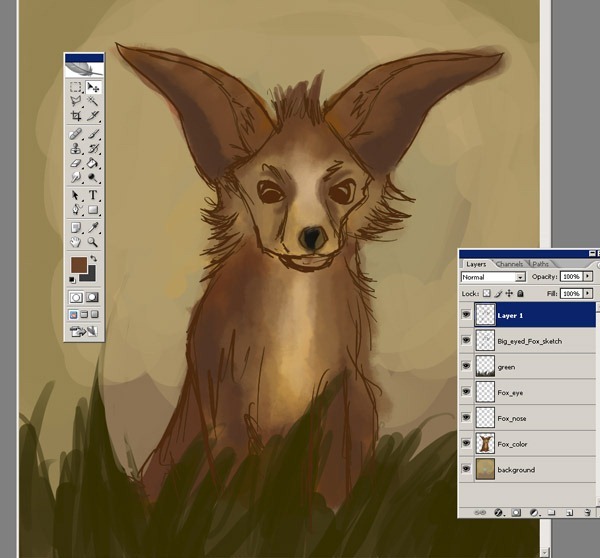
Now after you have name the new layer . Sketch out the fox character on a new layer. Don,'t worry if the sketch is bad..this is just a guide for you colors and such. Here as you see, first I make a character sketch. I use a dark brown because it stands out..but you can use whatever you want of course :) Well, as you see these lines don't need to be perfect...I'll change the blend mode of the "sketch" layer from Normal to Multiply.
Step 4
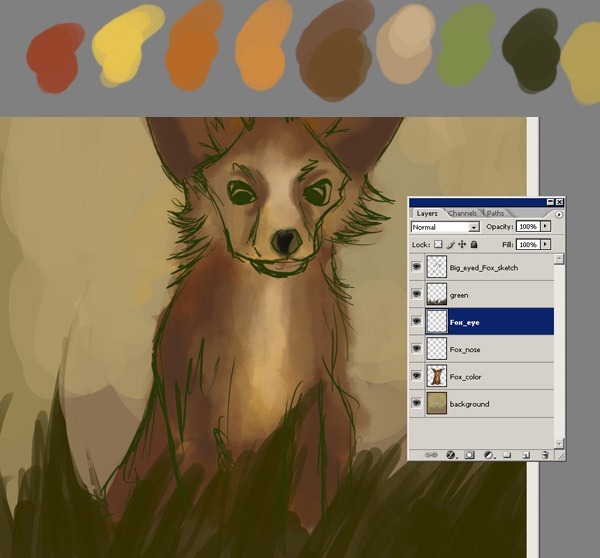
Now after you have name the sketch layer draw your own sketch. Here these are my other layers for this illustration...surely on the next steps I'm going to create some more layers of course.... for now this three layer is sufficient. We cannot limited with only one layer for such detailed painting.
Step 5
I blocked in the colors with a large hard round brush and then roughly added detail with a smaller size of the same blocking brush. Here as you see, I started placing main colors, I simply took a smaller brush and added more colors.The reason for painting on such new layers because of you need to make corrections later in the painting. It is much easier to fix errors if the main elements of your painting are separate entities. This main step is really really very important.
Step 6
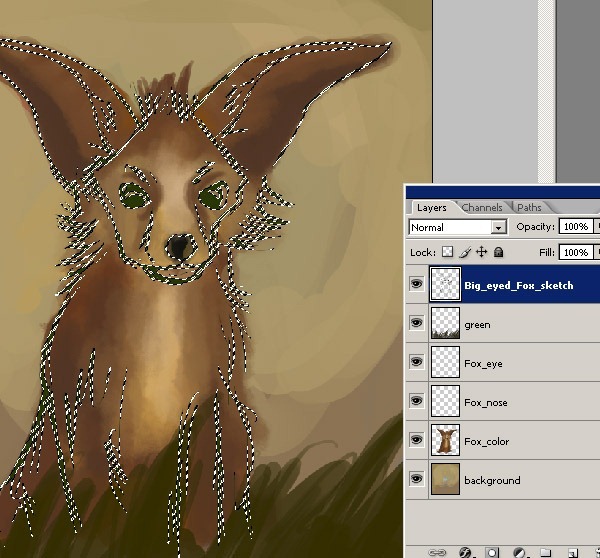
And now choose the sketch layer. When you select the sketch layer it will be look like this. To select the sketch layer hold down the Ctrl (Win) / Command (Mac) key and and at the same time click on the Big_eyed_Fox_sketch Layer icon on the Layers palette.
Step 7
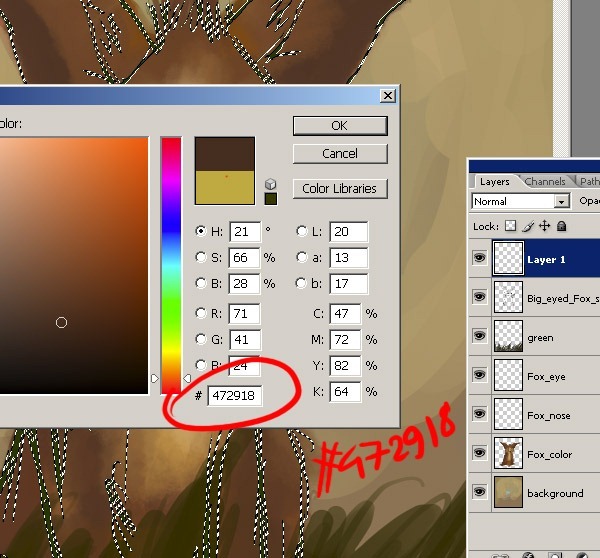
Click on the New Layer icon at the bottom of the Layers palette, and after that open a new layer. And now choose the (#472918) color. This will be the new color for the character outline.
Step 8
Choose the Paint Bucket Tool (G)fill the new layer with this new color. This is a new color for the character outline.

Nenhum comentário:
Postar um comentário